If you’re about to start the process of installing flooring in multiple portions of your home, you may be wondering how to go about transitioning it from one room to another. This article will function as an installation guide so that you can accomplish a flawless installation in no time.
The Importance of Transitioning Your Flooring
Transitioning flooring may seem like a complicated process, but it’s a very necessary part of your flooring installation. There are multiple reasons why you shouldn’t skip a proper transition, both for the function of the flooring and the design elements of your home.
Functional Reasons
In many cases, your flooring will need an expansion gap so that it doesn’t buckle or shift due to temperature changes. This is particularly important for hardwood flooring. The reason for this is that materials expand and contract constantly due to atmospheric conditions in the home. If there’s no excess play in the flooring to accommodate this, the flooring will have nowhere to go but up, leading to buckling and bumps.
Gaps are often installed under the baseboards, around the perimeter of the room, but another excellent place is in between rooms. By properly transitioning your flooring you can place a gap between rooms in an inconspicuous way. You may be tempted to simply extend a long continuous line of flooring from one room to another, but this is a recipe for disaster. Most flooring needs a ¼’’ expansion gap at least every 30 feet. It’s important to note that you do not need an expansion gap with stick-on flooring, only click-lock and loose lay. Source: Best Home Fixer
Transitions are also necessary when using different flooring types that have height differences. You’ll need to properly install transition strips so that there’s no abrupt height change between them. Transition strips also function as a visual queue that the flooring height is changing, allowing you to step throughout your home without tripping.
Design Reasons
Transitions are also important for the aesthetic of your home. Ultimately, you have creative freedom as the homeowner. Many people don’t like the look of the same flooring being continuously used throughout the home and they often want other types of flooring installed. For example, an average home might have wood flooring in the dining room, carpeting in the living room, and tile flooring in the bathroom. Properly transitioning between these flooring types is important to create a visual break and maintain the flow throughout the home.
If choosing to use the same flooring in multiple rooms, some homeowners like to change the direction of the flooring. Adding a transition between the rooms allows you to do this without leaving an awkward pattern change.
How to Transition Your Flooring from Room to Room

Installing flooring in a standalone room is a straightforward process that many people choose to do themselves. When it comes to transitioning flooring between multiple rooms, the project can become much more difficult. However, it’s still achievable with the proper forethought, technique, and tools.
Let’s look at how it’s done.
Make a Plan Ahead of Time
Before you even begin the installation, you’ll need to make a solid plan. You can’t simply begin placing planks because you’ll eventually get to a point on the floor where the flow is completely ruined. By taking some time and planning out the orientation of all your flooring, you’ll be able to visualize how it’ll look and plan for the necessary transitions.
Choose a Direction
Before you begin the installation, you’ll also need to determine in what direction you would like all the planks to go from room to room. This is a crucial part of the planning process that you’ll want to consider beforehand.
Most design experts recommend that you lay plank flooring parallel to the longest walls. This is not a strict rule, however, and you may wish to do the opposite. You may also want to consider the angle at which you’ll be viewing the flooring. Flooring running parallel with your line of vision is generally more visually appealing than it running perpendicular.
Laying the Flooring
Now that you have a design visualized and the orientation of your flooring plan, it’s time to begin installing the planks. For all intents and purposes, we’ll assume that you know the proper procedure for the specific type of flooring you have. Here, we’ll just cover the specific details that make transition flooring different.
Depending on where the room is most often viewed from, begin at the furthest part of the room and make your first line against the wall. If using click-lock flooring, be sure to leave space for the expansion gap. Continue to lay more flooring, working your way outwards and staggering the planks to create a smooth visual appearance. When you get to doorways, make notches in the flooring as needed to smoothly wrap around the frame.
If you’re approaching a new room and or closing in on the 30-foot rule discussed above, leave a ¼” to a 1/2” gap to serve as an expansion gap. This is the perfect place for a transition strip.
Add Transition Strips Where Needed
Transition strips are a vital tool for your multi-room flooring installation, and you’ll need to utilize them often. There are various situations where they’re needed, such as:
- Where your flooring meets a different flooring type
- In between rooms where an expansion gap is needed
- Areas where flooring heights change
- Along baseboards
- To break up lengths of floor exceeding 30 feet.
What are Transition Strips?

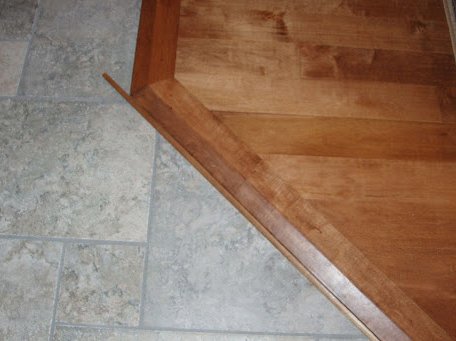
Transition strips are a piece of flooring hardware that help to connect two sections of flooring together. While it is possible to connect two rooms without a strip, adding one often adds more style and functionality to the floor. Transition strips are nailed into, or glued directly on the subfloor. They hide gaps between flooring transitions and create smooth height changes between different flooring types.
Source: The Spruce
Choosing the Right Type of Transition Strip
There are a number of varieties of transition strips, with each having a different application for its use and type of floor. Before beginning your flooring installation, be sure to determine which types you’ll need. With the properly fitting ones, you’ll be able to complete your transition flooring installation properly, with the highest aesthetic finish.
Let’s have a look at the different types available and when you should use them.

T-Bar
This type of strip is used when the two sections of flooring are the same height. Its primary purpose is to hide the expansion gap in between rooms, where floor lengths exceed 30 feet, and to fill in the gap when you’ve decided to change the flooring’s orientation. T-Bars are necessary to prevent trips while walking over flooring gaps, and they help create a seamless appearance.
Reducers
Reducers are used when two flooring sections are different heights and there needs to be a gradual, gentle transition. This removes the abrupt drop-off that would otherwise be experienced. Reducers are great for transitioning flooring to carpet, as carpet is normally significantly lower in height. Reducers can also be used for transitioning vinyl to tile, as tile will almost always sit higher.
Quarter Round
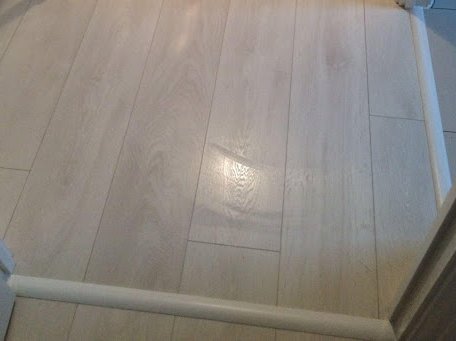
A quarter-round transition strip is used along the baseboards where most expansion gaps are found. They hide the unsightly slit that surrounds the perimeter of the room and also prevent debris from getting stuck inside.
Don’t Forget an Expansion Gap
Regardless of what method you take to transition your flooring, the most crucial element is remembering to implement expansion gaps at regular intervals. It was said before, but it can be said again. Without them, your flooring installation is going to suffer serious damage and you’ll likely have to redo the entire process.
Flawlessly Transition Your Flooring
A well-executed flooring transition can go miles toward the design style of your home. When installed properly, they allow you to have a continuous flow throughout the house. If planning this type of installation for your home, thinking ahead and strategizing the process is the best way at ensuring its success. Additionally, the correct use of transition strips and expansion gaps will be the finishing touch that sets a quality install apart from an amateur one.
For the highest quality installation, it’s best recommended to trust a reputable flooring installer. Alluring Flooring is your flooring expert, both with installations and products. To get started, browse our stunning flooring collection today.

